 Back to Exterior Painting How-To's
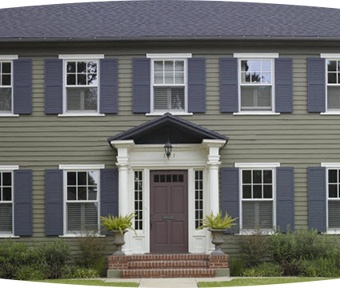
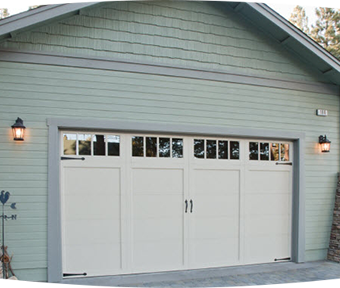
How to Paint Exterior Trim, Fascia and Doors
Painting your home's trim, fascia, or doors can be easy. This is a project that can make the biggest impact in changing your home's appearance.
For Best Results:
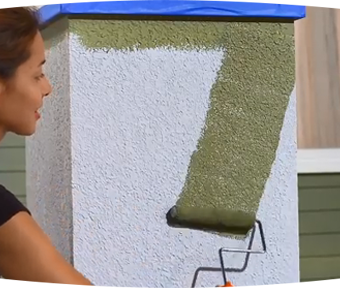
Start at the corner and use a smooth motion to brush or roll the project area.
Use a brush for painting in small panels and over the entire surface to avoid the appearance of roller stipple.
Allow enough time for the paint to dry fully before putting doors and windows back into use.
Suggested Tools & Supplies
- Brush 5.1 - 6.4 cm (2"-2½")
- Bucket
- Vinyl Gloves
- Ladder
- Paint Can Opener
- Rags
- Stir Stick
- Roller Cover and Frame
- Extension Pole
- Painter's Tape
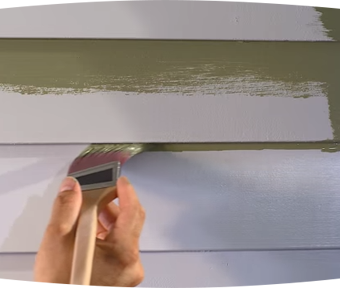
The Fascia
-
Step 1
Begin your painting project by pouring thoroughly mixed paint into a bucket and dipping a quality 5.1 - 6.4 cm (2"-2½") wide nylon/polyester brush into the paint.
TIP: When working outside, it is best to work out of direct sunlight and in temperatures between 10º-32º C (50º-90º F) with moderate humidity.
-
Step 2
Using your brush, cut in along the edge where the roofline and the fascia meet and/or where the wall and the fascia meet.
-
Step 3
Starting at an upper corner, use your roller to paint the fascia board.
-
Step 4
Continue working into the cut-in area with your roller until the fascia board is complete.
TIP: For optimum results in quality of color and finish, apply a second coat.
-
Step 5
With your roller, paint the bottom edge of the fascia board and continue until the project is complete.
The Door
-
Step 1
Begin your painting project by pouring thoroughly mixed paint into a bucket and dipping a quality 5.1 - 6.4 cm (2"-2 ½") wide nylon/polyester brush into the paint.
TIP: When working outside, it is best to work out of direct sunlight and in temperatures between 10º-32º C (50º-90º F) with moderate humidity.
-
Step 2
Use a smooth motion to brush or roll the project area. Reload the brush or roller as necessary, when it starts to chatter.
TIP: To avoid drips, tap off the excess paint against the inside wall of the bucket.
-
Step 3
For paneled doors and frames, paint into the recessed area of the panel. Begin at a corner of the recess and continue around its perimeter. Work from top to bottom.
TIP: Use the panel bordering as natural break points, cutting around edges and filling in the middle.
-
Step 4
Continue painting the remainder of the panel until the entire panel is complete. Repeat the process of painting the panels and their recesses until all the panels are complete. Wipe away the excess paint that has overlapped onto the stiles.
TIP: To eliminate unwanted hard lines, smooth out the panel by taking a lighter stroke and feathering the edge. Do not brush back into any painted surface more than a couple of minutes after applying it.
-
Step 5
When the panels are complete, paint the stiles of the door in the following order: middle, top, center, bottom, left, right.
TIP: Reload the brush when necessary and maintain a wet edge.
The Door Frame
-
Step 1
Starting at the top of the door frame, begin painting the inside of the frame.
TIP: Work outward from the edge of the door.
-
Step 2
Continue until the frame is complete. Wipe away the excess paint that has overlapped onto the trim.
The Door Trim
-
Step 1
Starting at a top corner of the door trim, begin painting along the side edge of the trim where it meets the wall. Continue until all side edges of the trim are complete.
TIP: Reload the brush when necessary and maintain a wet edge
-
Step 2
Return to the top of the door trim and begin painting the face of the trim.
-
Step 3
Continue until the door trim is complete.
ADDITIONAL RESOURCES

PAINT AND STAIN CALCULATOR
Inside or outside; paint or stain: Let’s figure out how much you’ll need to make amazing happen.
Calculate
ASK AN EXPERT
Every project is unique: Keep small wrinkles from becoming big problems by letting the Behr Technical Experts lend a hand.
Get Expert Help
COLOUR STUDIO
So many colours and so many ideas: Visit Behr’s Colour Studio for inspiration, colour tools, design advice and everything you need to find your project’s perfect colour.
Colour Studio


