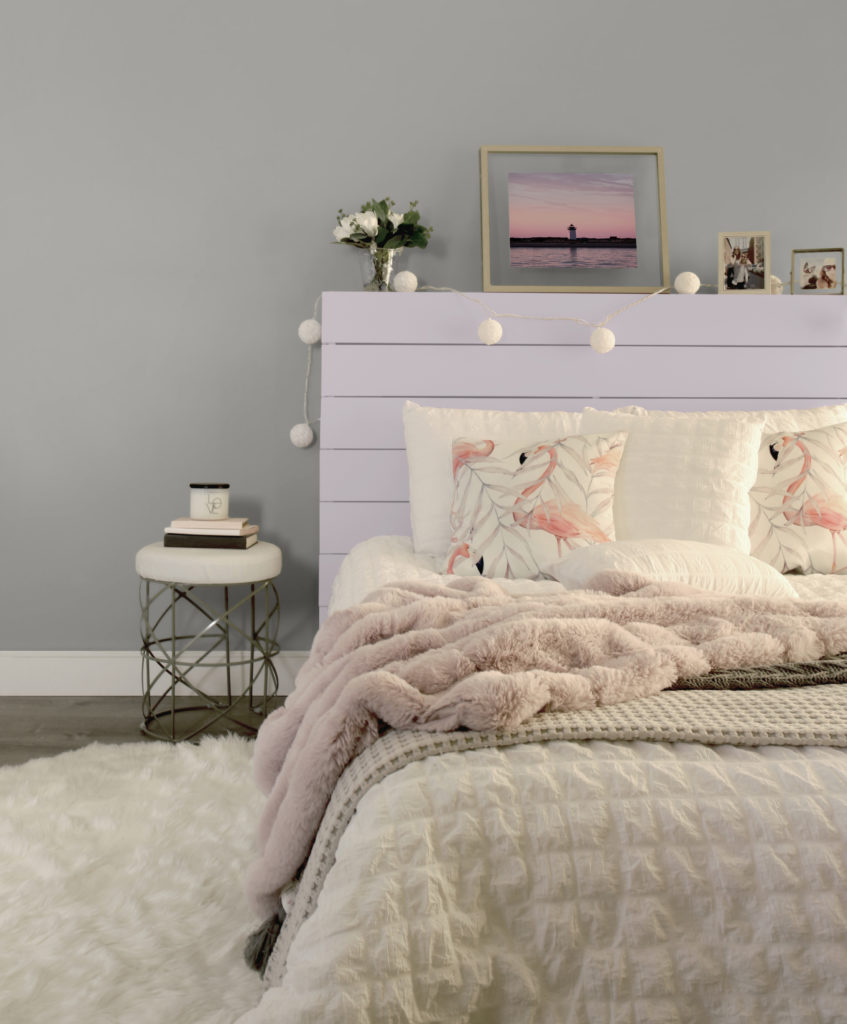
On this Valentine’s Day, romanticize your bedroom with a new headboard painted in Dusty Lilac that is a perfect fit for a room to dream in.
Difficulty Level: Advanced
Time To Complete: 5-6 hours
Materials and Tools:
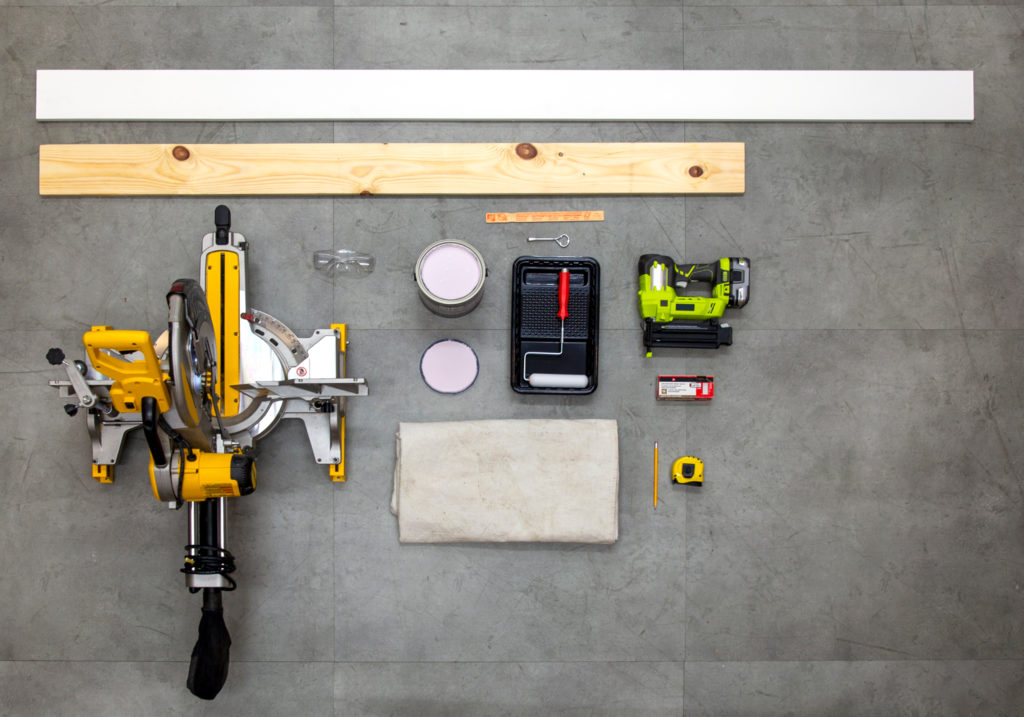
- Interior Paint, Tray, Roller
- BEHR ULTRA™ Interior Eggshell Enamel
- Colour: Dusty Lilac N110-1
- Boards – 13 Total
- Frame: Four Raw Wood Boards: 5 ½” x ¾” x 6ft
- Top, Front, and Sides: Nine Primed Boards: 5 ½” x ¾” x 8ft
- Helpful Tip:Use primed boards for a smoother finish when painting
- Miter Saw
- Helpful Tip:Not comfortable using a Miter Saw; ask a Sale Associate at your local The Home Depot to cut your boards to size.
- Nail Gun
- 18 gage works best however, you can use nails and a hammer
- Protective Glasses
- Stir Stick or Wood Ruler
- Measuring Tape and Pencil
- Drop Cloth
Optional Tools - Clamps
- Electric Sander or Sandpaper
Step 1: Measure and Cut Boards to Size

- Frame: Measure boards to sizes below, then cut a straight edge
- Three Raw Wood Boards – 43 ¼” long
- One Raw Wood Board – 58 ½” long
- One Primed Board – 58 ½” long
- To Cover Frame: Measure and cut the last eight of the 80” Primed Boards
- Eight Primed Boards cut into three pieces using the Miter Saw at 90º angle
- Angle Cuts to Sizes: 6.25”, 5ft, 6.25”
- Eight Primed Boards cut into three pieces using the Miter Saw at 90º angle
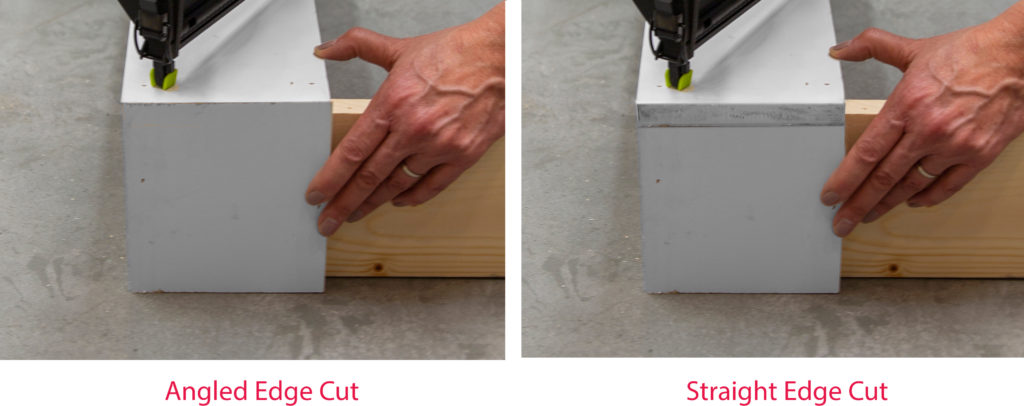
- Helpful Tip
- The Miter Saw will give you angled cuts that join together to make a clean-finished edge
- Using straight cuts will also work and can be easier to handle. In the end, you will need to sand the raw edge
Step 2: Build Out the Frame

- Use the boards to build the Frame for your headboard
- Inside of Frame: Three Wood Boards – 43 ¼” long
- Bottom of Frame: One Wood Board – 58 ½” long
- Top of Frame: One Primed Board – 58 ½” long
- Position the Frame boards as shown in the above picture
- Be sure your edges meet and are aligned
- Hold with clamps or have someone help to keep secure
- Using your nail gun, attach boards, nailing from outside facing in
- Keep fingers and thumbs clear of the area you are nailing into
Step 3: Cover Frame with Primed Boards
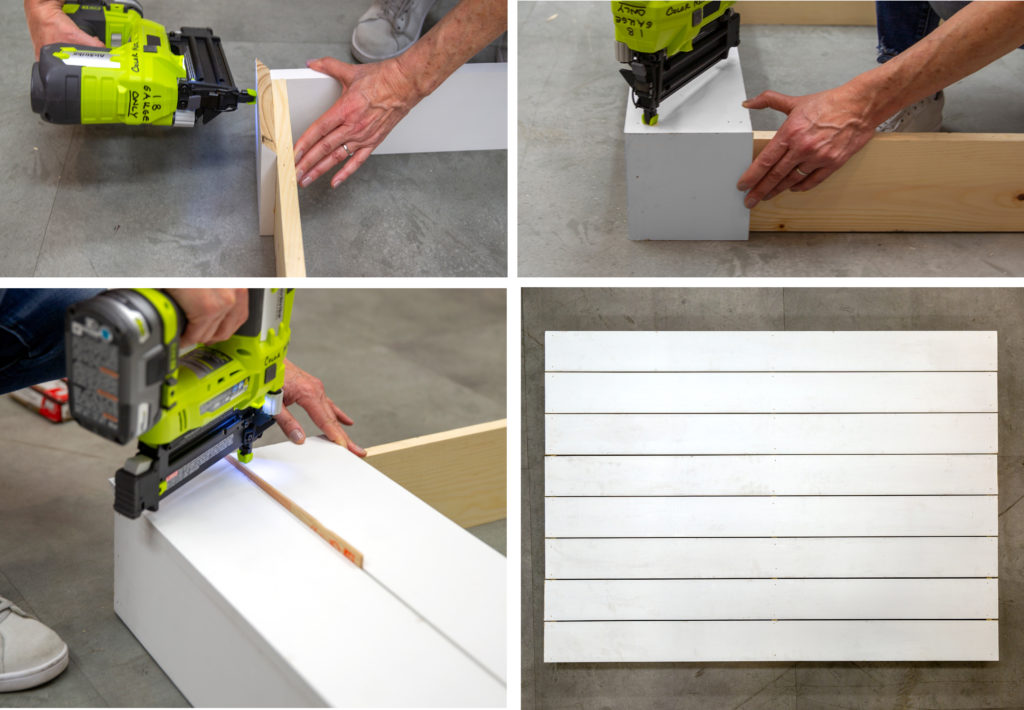
- Start with two of the 6.25” pieces (example picture above, top left)
- Place on the sides of the frame, one on the left and one on the right
- Align the bottoms of the frame and 6.25” piece
- The lower edge of the angle from the 6.25” piece should align with the top of the sideboard
- You will have .75” of wood, angled above the sideboard
- Use clamps to hold in place
- Next use one 5ft piece (example picture above, top right)
- Place the 5ft piece across the top of the frame aligning the cut angles
- The angles should join together giving you a nice clean edge
- Nail the 6.25” pieces and 5ft piece into the Frame
- Repeat steps, using the Stir Stick for spacing between each row (example picture above, bottom left)
- Place Stir Stick along the edge of the first row
- Repeat process, butting the next row against the Stir Stick
- Remove Stir Stick once boards are secured
- Helpful Tip
- Same steps apply if using straight cut instead of angled
- It can be easier to align the pieces with a straight cut
- Once all boards are added, you may want to fill in nail holes with wood putty and sand the sides to smooth
Step 4: Paint Headboard
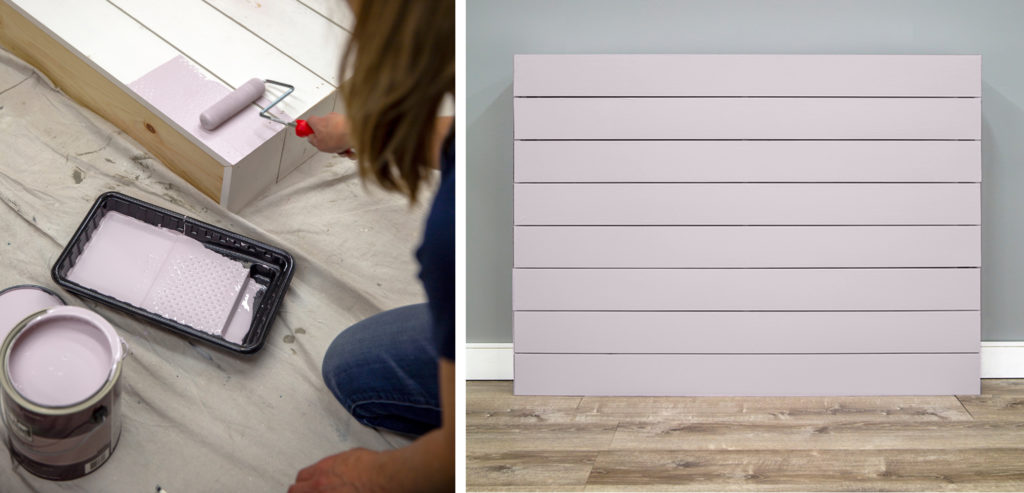
A small roller is a good option for painting the headboard. The roller fits the boards and is quicker and easier than a brush.
We used BEHR ULTRA™ Interior Eggshell Enamel paint tinted to the colour Dusty Lilac N110-1. We picked Eggshell because this sheen has a soft, velvety appearance. We like how the colour looks in this sheen and fits nicely in our finished room. However, if you want to try something different, check out behr.ca for a variety of colours and paints to choose from. You can even try one of Behr’s Decorative Finishes like Chalk or Spray Paint for this project!
Step 5: Place in Room and Sleep Peacefully
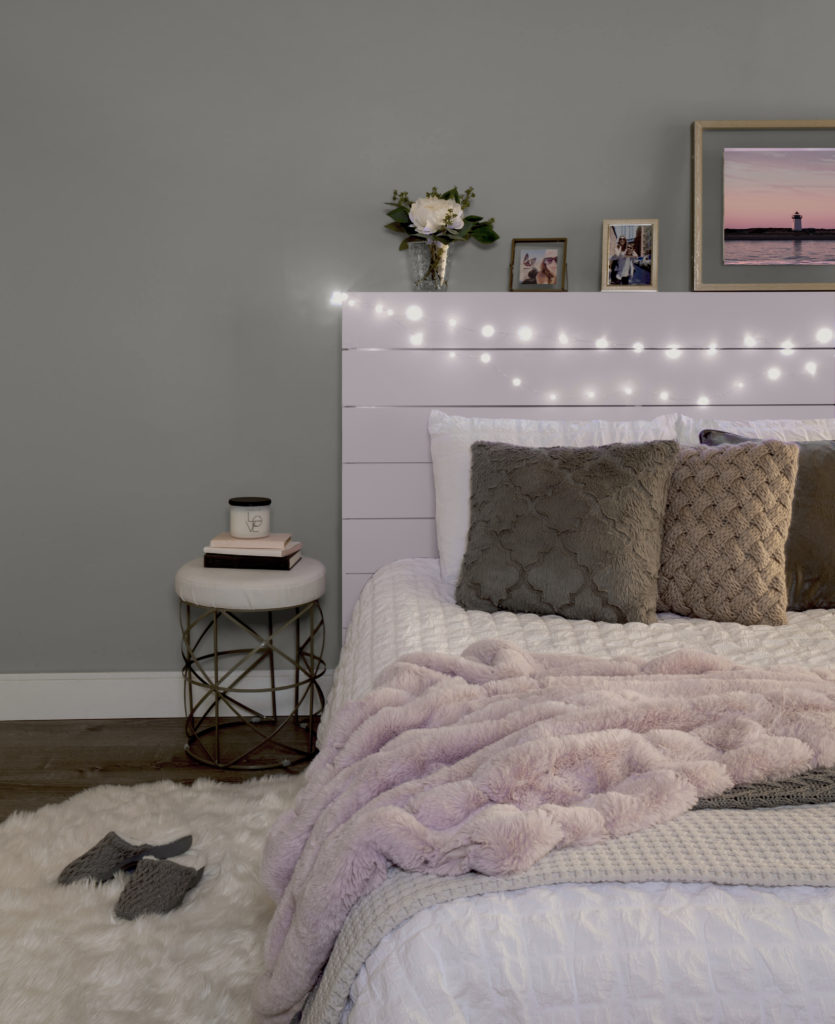
Set up in your room. The look of this headboard combined with the Dusty Lilac colour creates a Contemporary Chic feel. For the wall, we used a soft grey, Classic Silver PPU18-11. You can explore other colour options that work with Dusty Lilac using ColorSmart by Behr. Add soft fluffy pillows and blankets in purples and greys to crisp white bedding. The top of the headboard can be used as a shelf. Colourful art and photographs placed in metal and glass frames work well for this style. Complete the look with a string of lights. Small and glimmering for a sophisticated feeling or go with big and fun for a younger look.
Colourfully yours,
Larayne