TV Cabinet
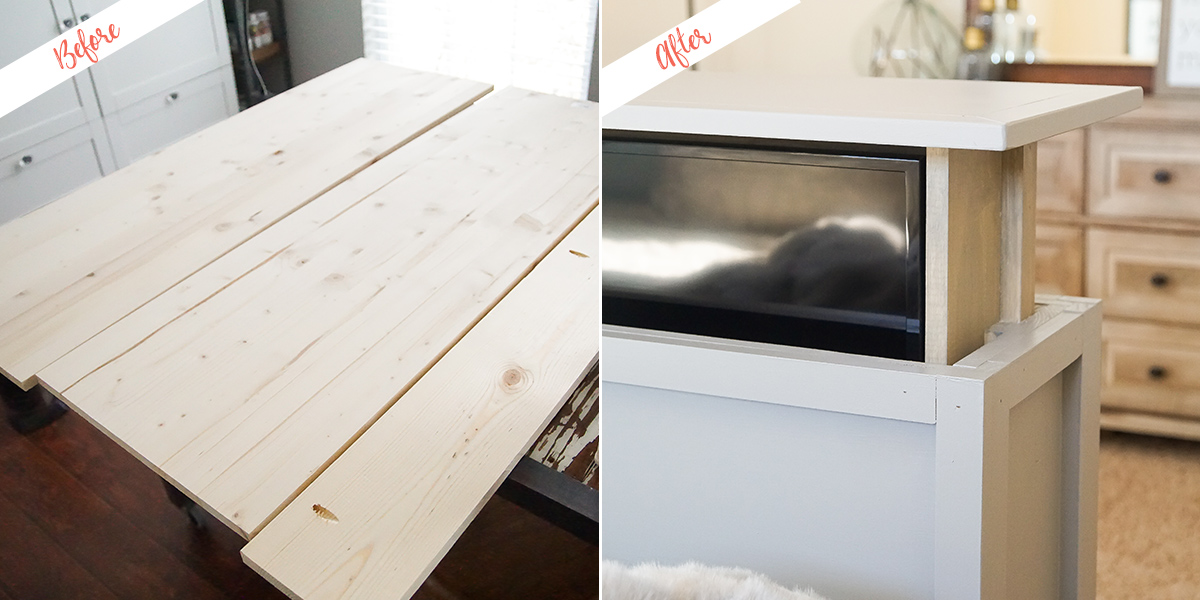
For several years we have talked on and off about putting a TV in our bedroom. During my last pregnancy, sitting on the couch to watch TV became so incredibly uncomfortable and miserable. I just wanted to go to bed. So we would often watch a TV show on an iPad in bed before going to sleep at night. Which made us rethink a project we had begun to dream up a couple of years ago, a Cabinet with TV Lift for our bedroom. We began to think about how we wanted to actually make this cabinet. What it would look like, how it would work and what colour it would be. So today I am really excited to share the details of my Faux Blueprint Cabinet with TV Lift with you! I really think you're going to love it!

Every TV is slightly different in size so it is important to create this to fit the TV you purchase.
I am not going to share all of the exact dimensions because we custom built this to fit around the TV we bought. Every TV is slightly different in size so it is important to create this to fit the tv you purchase. But our overall size is about 48" wide, 36" tall and 12" deep when the tv is inside the cabinet.
Our overall design was inspired by the design of a kitchen drawer, but instead of the drawer pulling out horizontally, it will lift vertically and hold a tv on it. So we built both a decorative exterior cabinet and an interior "drawer" that slides upward with the help of a linear actuator.
Construction of Exterior Cabinet
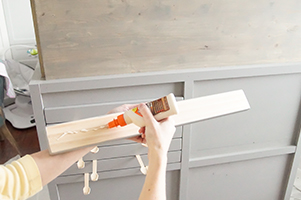
We began by using a Kreg Jig and wood glue to join (2) 16" x 1" boards and (1) 6" x 1" board together to make one of our cabinet faces. Then we used the jig and wood glue to join a 10" x 1" board to each side of the cabinet face to make the sides of the cabinet.
Building the Inside Drawer
We began by joining (2) 16" x 1" boards to make the back of the drawer. We used 8" x 1" boards for the sides. This was built in the same manner as above, using the jig and wood glue, but this was small enough to fit inside of the exterior cabinet and allowed enough room for a 1" x 2" to fit on either side of it inside the exterior cabinet.
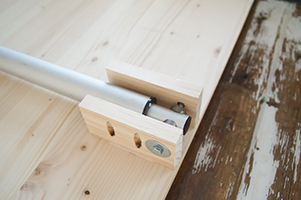
The Interior TV Guides
We knew we needed some sort of guide to help the TV slide up and down. We looked into buying drawer slides, but we weren't able to find ones long enough at our local hardware store and special ordering them would have been very costly. So we decided to make guides out of 1" x 2" wood.
Using wood glue and our nail gun, we installed (2) 1" x 2" guides on the inside of the exterior cabinet and (1) 1" x 2" guide on the outside of the drawer.

Front Cabinet and Stabilizers
At this point our exterior cabinet had a back and two sides. So we created one more cabinet face to complete it. We made this in the same manner that we made the other cabinet face using (2) 16" x 1" boards and (1) 6" x 1" board, a jig and wood glue. We used wood glue and our nail gun to secure it in place.
Because our TV cabinet will be sitting at the foot of our bed, we wanted to add one more layer of stability to it. We created "feet" that would slide underneath our bed and place something heavy on it to help make sure the cabinet doesn't tip over. We used 10" x 1" boards and screwed them into the base of the exterior cabinet.
Decorative Finishes
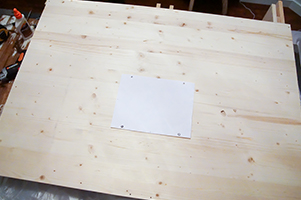
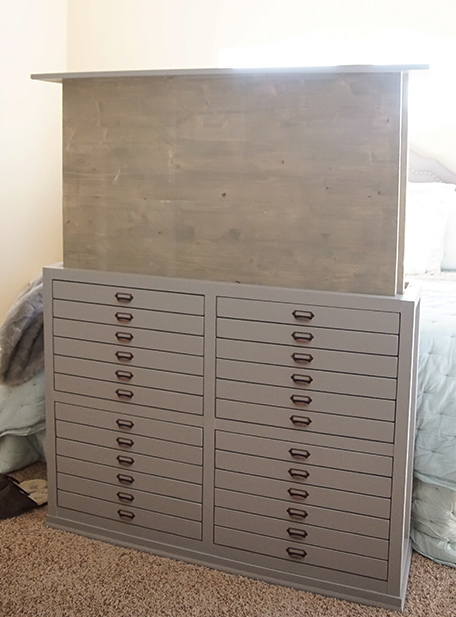
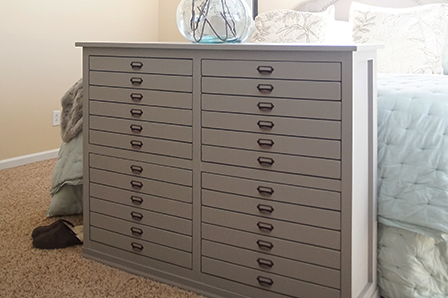
We added decorative trim around the base of the cabinet and 1" x 2" trim around the edges, across the middle and down the center of the cabinet front. To create the top of our cabinet, we used the jig to join 1" x 2" boards around a 12" x 1" board. We used the jig to attach the top to the interior drawer.
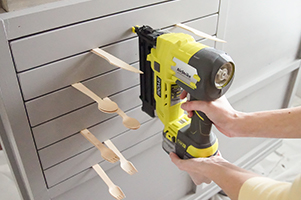
To make our faux drawers, we measured and cut (24) 1” x 3” boards. We used wood putty to fill in any spots on the cabinet. And then we sanded everything.
We used KILZ Premium Primer to cover the entire exterior cabinet and faux drawer fronts. We painted the exterior and drawer fronts with BEHR PREMIUM PLUS ULTRA Paint in Casual Grey.

Front Cabinet and Stabilizers
After the paint was dry, we used wood glue and a nail gun to attach the faux drawer fronts to the front of the exterior cabinet.
Then we added the hardware to the drawer fronts.
Once the TV cabinet with lift was in place in our bedroom, we mounted the TV to the board. And then we installed the board into the cabinet by screwing it into place.
Tips and Tricks
- Tip 1: Two coats of paint give you a much nicer look than one coat, so take your time and always add a second coat to your projects.
- Tip 2: Allow your paint to dry completely according to the manufacturer instructions in order to get the most durable finish.
Behr paints allow you to coordinate colours to help create a visually interesting space that looks beautiful whether you go bold with colour or stay neutral.
The Big Reveal
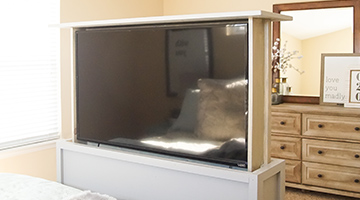
We really love how this turned out and just love how amazingly well it works! I do want to show you a photo of what it looks like when the TV is up, as you walk into the room.
And one more photo because it’s just so pretty.
Ready to DIY?
Find your colour, pick your paint, and be inspired.
When you're ready, buy your paint online.
- Explore colours on your own or browse through our curated collections.
- Choose colours, room images, calculate quantities and more.